|
In the first article in this series, I demonstrated how to use the Dynamics CRM LINQPad Driver to connect LINQPad to CRM. In this follow-up I will show how to create a ‘manual’ connection, and why you might want to do this. Create a basic ‘WhoAmI’ request in LINQPad without the CRM LINQPad driver. Whilst the steps outlined below might seem laborious, you will only need to carry out the majority of these actions the first time you create a manual connection to CRM. Create a new query in LINQPad and change the type to C# Program. You will see the following program template: 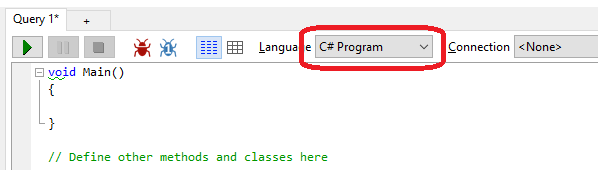 Replace the entire query with the following code: NB This example uses an internet facing on-premise connection to CRM 2015. You may need to adjust the code to make a connection to your own CRM organisation. You will notice that certain elements in the code are highlighted red – this is an indication that the script is missing an assembly reference:  he way in which you deal with this will depend on whether you are using LINQPad Premium/Developer or the Free/Pro edition. Importing assemblies using the NuGet package manager The Premium and Developer editions offer full NuGet integration, so you can import the missing assemblies from NuGet. To import the missing assemblies, press F4 and then ‘Add NuGet’ to launch the LINQPad NuGet package manager (or press Ctrl+Shift+P to go to it directly). Search for Dynamics CRM to show a list of relevant assemblies – I tend to use the Dynamics CRM 2015 Clean SDK Assemblies, but you may use others depending on your version of CRM, etc. Click ‘Add to Query’ for the assembly you wish to add: 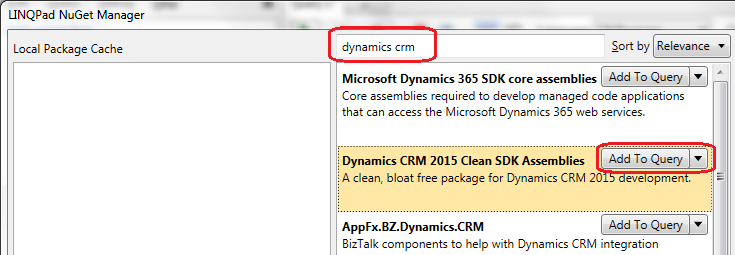 Now press ‘Close’ and ‘OK’ to return to your query Adding assemblies to your query manually If you do not have the Developer or Pro editions of LINQPad you can still add the required assemblies to your query. Press F4 to launch the Query Properties window. Browse to the location of the assemblies you want to add (such as your SDK Bin folder) and select the assemblies you require – for this example you will only need Microsoft.Crm.Sdk.Proxy.dll and Microsoft.Xrm.Sdk.dll. 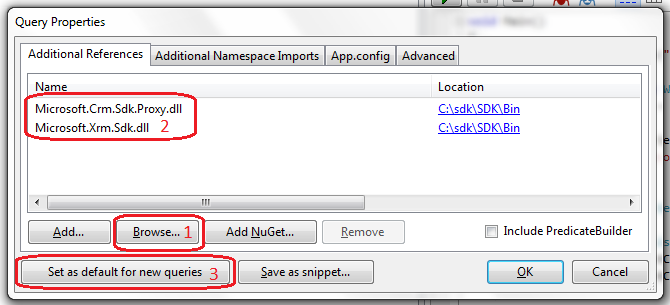 If you want these to be added by default for new queries, press the ‘Set as default for new queries’ button. NB It is also possible to create a ‘Libraries’ folder in the same folder as the LINQPad executable. Any dll’s added to this folder will automatically get picked up by LINQPad. 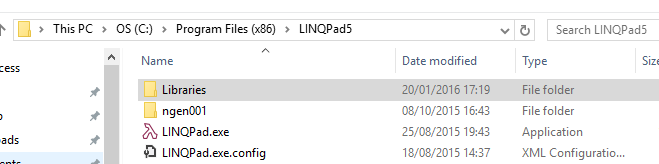 Adding ‘using’ directives to your query Regardless of the way in which you added assemblies to your query, you now need to add ‘Using’ directives to tell the query which assembly to use. You will notice that the lines which are highlighted red now have a little blue drop-down allowing you to either add a ‘using’ statement to the query, or to use a fully qualified class name:  Select the ‘using’ option and LINQPad will add an (invisible) using directive to the query. Repeat this for any other elements which are not yet bound to a using statement. Once you have gone through this process, there will still be one unresolved reference. If you try and run the query you will get this error:  Hit F4. You will be asked if LINQPad should automatically add the missing reference: 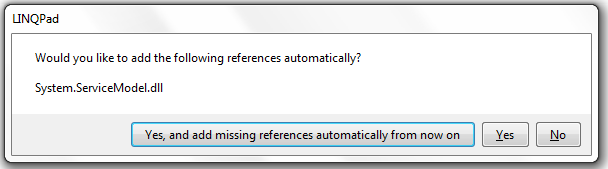 Press “Yes, and add missing references automatically from now on”. NB You only need to go through the above process once. Once you make the correct assemblies available to LINQPad, these will be available in other queries and the references will be automatically resolved. NB2 You may also get an error saying that Microsoft.IdentityModel or one of it’s components cannot be found. To install Windows Identity Foundation on your machine, follow these steps: blog.xrm.com/index.php/2012/10/quick-tip-enable-windows-identity-foundation-windows-8/ Run the Query Press ‘F5’ to run the query. The first time you do this you will be prompted to enter your password. 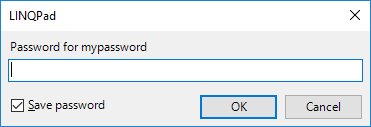 This is because we are calling the Util.GetPassword method. When you enter your password and select ‘Save Password’, your credentials will be stored by LINQPad’s password manager. This allows you to store credentials in encrypted format so that you do not have to store them as plain text in your query – this is particularly useful if you are sharing scripts amongst a team! Subsequent uses of the script will use your saved password without prompting. You can manage your passwords through ‘File -> Password Manager’. After you have entered your password, the request should execute and you should see the results:  Why create a manual connection to CRM?
Whilst using the LINQPad driver for CRM offers some advantages over the manual process outlined above, there are certain circumstances where you would want to connect to CRM without using the driver.
0 Comments
Leave a Reply. |
Archives
July 2021
Categories
All
AuthorSome stuff about me! |
 RSS Feed